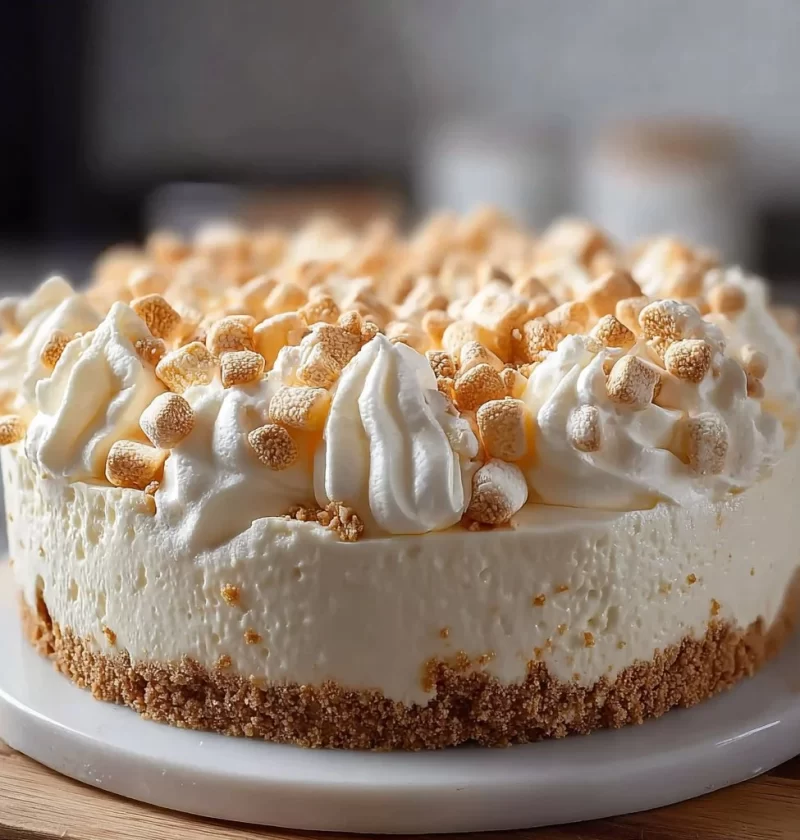
Marshmallow Whip Cheesecake: A No-Bake Dream Dessert
If you’re craving a dessert that’s as light and fluffy as a cloud, then get ready to meet your new favorite: Marshmallow Whip Cheesecake! This scrumptious, no-bake delight is perfect for any occasion, whether you’re celebrating a birthday, hosting a summer gathering, or just wanting to treat yourself to something sweet on a Tuesday afternoon. Trust me, once you take that first bite, you’ll be floating on marshmallow clouds!
Introduction
Growing up, my kitchen often smelled like something delightful was happening, usually courtesy of my mom whipping up her famous no-bake desserts. It was like magic—one moment there was a mix of flour and butter, and the next, we were pulling sweets out of the refrigerator that looked (and tasted) like they belonged in a pastry shop. I remember pacing around the kitchen, gazing at that beautiful Jell-O parfait we had made, or the towering, creamy pies she prepared, with an insatiable urge to dip my spoon in early.
This Marshmallow Whip Cheesecake has its roots in those cherished memories. It’s not just about the cheesecake; it’s about the enchanting process of creating something delicious, the laughter shared over spoons and spatulas, and the moments that linger long after the last bite is gone. The fluffy texture of marshmallow fluff paired with rich cream cheese is a heavenly combo, and when you toss in a crumbly graham cracker crust? Oh, my dear friend, you’re elevating dessert to a whole new level!
This dessert is as indulgent as it gets, but it’s also incredibly simple to make. No cooking means no standing over a hot stove or dealing with complicated steps. You can whip this beauty up in less than an hour, with just a little chill time to help everything set. So, gather your ingredients, roll up your sleeves, and let’s create something amazing that’ll have everyone begging for your never-ending recipe!
Personal Story
It was a sunny Saturday afternoon, and I had invited a few friends over for a casual get-together. I wanted something fabulous yet stress-free, and it hit me like a sweet revelation: marshmallow cheesecake! I was reminded of the sunny days spent in my mom’s kitchen, making her signature no-bake treats with whatever easy ingredients we had on hand. In that spirit, I dove into the creation of the Marshmallow Whip Cheesecake, hoping to re-create a piece of nostalgia and sweeten our time together.
As I mixed, folded, and layered this cheesecake, I couldn’t help but smile at the thought of those carefree days. The sounds of laughter, the clinks of spatulas and bowls, and the joy of sharing food with loved ones flooded back. When I finally unveiled the cheesecake, topped with strawberries and drizzled chocolate, it was met with applause and delight. One bite, and everyone was transported back to their childhood, reminiscing about sweet summer days spent indulging in fluffy treats just like this. It was a stunning reminder of the magic that happens in the kitchen and how food brings us all together.
Ingredients
Here’s what you’ll need to whip up this dreamy cheesecake:
-
1½ cups graham cracker crumbs
- Chef Insight: You can use store-bought crumbs or crush your own by placing whole crackers in a zip-top bag and using a rolling pin.
-
⅓ cup granulated sugar
- Tip: You may substitute coconut sugar for a slightly different flavor profile.
-
½ cup (1 stick) unsalted butter, melted
- Quick Note: Ensure it’s unsalted so you can control the sweetness of your cheesecake.
-
16 oz cream cheese, softened
- Substitution: For a lighter option, use Neufchâtel cheese, which has less fat but still gives that creamy texture.
-
7 oz marshmallow fluff (1 jar)
- Chef Tip: This sweet marshmallow spread is key to the fluffy texture!
-
1 tsp vanilla extract
- Flavor Boost: Use pure vanilla extract for a rich, aromatic experience rather than imitation vanilla.
-
1 container (8 oz) whipped topping (like Cool Whip), thawed
- Why it Matters: This makes the cheesecake light and airy! Store brand works just fine, but you could also use homemade whipped cream for a fresher flavor.
-
Fresh berries (for topping)
- Choices: Strawberries, blueberries, or raspberries all add a refreshing touch.
-
Mini marshmallows (for topping)
- Chef Insight: These adorable little marshmallows are perfect for adding more marshmallow magic!
-
Chocolate shavings or drizzle (optional)
- Extra Indulgence: Use dark or milk chocolate based on your taste preference.
-
Crushed graham crackers (for garnish)
- Presentation Tip: Spreading crushed graham crackers on the top will add an aesthetic and textural contrast!
Step-by-Step Instructions
-
Prepare the crust:
- In a mixing bowl, combine the graham cracker crumbs, granulated sugar, and melted butter. Stir until all crumbs are evenly coated and resemble wet sand.
- Tip from the Chef: If you want an extra crunchy crust, bake the mixture in a preheated oven at 350°F (175°C) for about 8-10 minutes. Let it cool before using.
-
Press the crust into the pan:
- Carefully press the crumb mixture into the bottom of a 9-inch springform pan. Use the bottom of a glass or measuring cup to pack it tightly and create an even layer.
- Hack: Leverage the sides of the pan too if you want a thicker crust which will give a nice texture when sliced.
-
Beat the cream cheese:
- In a large mixing bowl, beat the softened cream cheese with a hand mixer until it’s smooth and creamy, about 2-3 minutes.
- Chef Tip: Make sure the cream cheese is at room temperature; it’ll be much easier to whip and will prevent lumps!
-
Add marshmallow fluff:
- Mix in the marshmallow fluff and vanilla extract into the beaten cream cheese. Beat on low speed until just combined, then increase to medium speed until fluffy.
- Commentary: At this stage, the mixture is going to start smelling like heaven!
-
Fold in the whipped topping:
- Gently fold in the thawed whipped topping until fully integrated. Be careful not to overmix — we want to keep that airy texture.
- Little Hack: Use a spatula and fold from the bottom up, quite like folding in egg whites!
-
Pour the filling into the crust:
- Scrape the filling over the prepared crust and use a spatula to ensure it’s even across the surface.
- Tip: Don’t worry if it’s not perfectly smooth; a little rustic charm goes a long way!
-
Chill:
- Cover with plastic wrap and let the cheesecake chill in the refrigerator for at least 4 hours, but overnight is preferable for the best texture.
- Chef’s Note: As it sets, the flavors meld beautifully! The wait is worth it!
-
Prepare to serve:
- Once set, run a knife around the edges of the cheesecake before unhooking the springform pan.
- Presentation Tip: Transfer to a serving platter for a more formal presentation!
Serving Suggestions
To serve this dessert, slice it into wedges or squares and plate them up. Top individual slices with fresh berries, a sprinkle of mini marshmallows, and a drizzle of chocolate for an extra delightful touch. Trust me, your guests will marvel at the beauty of this fluffy masterpiece.
Recipe Variations
-
Chocolate lover’s delight: Add melted chocolate or cocoa powder to the cheesecake filling to turn it into a chocolate marshmallow cheesecake!
-
Fruit infusion: Fold in mashed ripe bananas or pureed strawberries into the filling for added flavor and excitement.
-
Nutty crunch: Sprinkle crushed nuts like pecans or almonds on top for a nutty flavor and extra crunch.
-
Key lime twist: Substitute lime juice and zest for half of the marshmallow fluff to create a zesty key lime version!
Chef’s Notes
Ah, this Marshmallow Whip Cheesecake has seen its fair share of evolution in my kitchen! Originally, I’d always stick to a very classic cheesecake recipe featuring just cream cheese, but I soon found myself inspired to create a fluffier, more playful cake. Friends and family were blown away by the introduction of marshmallow fluff—my father, especially, who insists that every dessert should have a touch of whimsy!
It’s also become my go-to dessert for last-minute gatherings, as it’s virtually foolproof. Plus, kids adore helping with the toppings. I mean, who wouldn’t want to sprinkle mini marshmallows on a dessert?
FAQs and Troubleshooting
Q1: Why is my cheesecake not setting?
A: It might need more time in the fridge! If after 4 hours it’s still wobbly, let it sit longer. The flavors get better with time, too.
Q2: Can I make this cheesecake ahead of time?
A: Absolutely! In fact, it tastes even better after chilling overnight. Perfect for prepping ahead of a gathering!
Q3: Can I substitute the whipped topping?
A: Yes! You can use homemade whipped cream, but ensure you stabilize it (with cornstarch or gelatin) if you plan on keeping it out for long.
Q4: How do I get clean slices?
A: Dip your knife in hot water and wipe it dry between slices for perfectly clean cuts.
Nutritional Info (Optional)
While I usually leave strict calorie counts behind, an average slice of this cheesecake can range around 300-400 calories. It’s a sweet indulgence, so moderation is key!
And there you have it, my sweet friends—a heartfelt and delightful ode to marshmallow magic. So why not grab those ingredients and let’s make some dreams come true in the kitchen? Happy baking! 🍰
PrintMarshmallow Whip Cheesecake
A light and fluffy no-bake dessert featuring a creamy marshmallow whip filling set on a graham cracker crust.
- Prep Time: 15 minutes
- Cook Time: 0 minutes
- Total Time: 255 minutes
- Yield: 8 servings 1x
- Category: Dessert
- Method: No-Bake
- Cuisine: American
- Diet: Vegetarian
Ingredients
- 1½ cups graham cracker crumbs
- ⅓ cup granulated sugar
- ½ cup (1 stick) unsalted butter, melted
- 16 oz cream cheese, softened
- 7 oz marshmallow fluff (1 jar)
- 1 tsp vanilla extract
- 1 container (8 oz) whipped topping (like Cool Whip), thawed
- Fresh berries (for topping)
- Mini marshmallows (for topping)
- Chocolate shavings or drizzle (optional)
- Crushed graham crackers (for garnish)
Instructions
- Prepare the crust: In a mixing bowl, combine the graham cracker crumbs, granulated sugar, and melted butter. Stir until all crumbs are evenly coated and resemble wet sand.
- Press the crust into the pan: Carefully press the crumb mixture into the bottom of a 9-inch springform pan.
- Beat the cream cheese: In a large mixing bowl, beat the softened cream cheese with a hand mixer until smooth and creamy.
- Add marshmallow fluff: Mix in the marshmallow fluff and vanilla extract into the beaten cream cheese.
- Fold in the whipped topping: Gently fold in the thawed whipped topping until fully integrated.
- Pour the filling into the crust: Scrape the filling over the prepared crust and use a spatula to ensure it’s even across the surface.
- Chill: Cover with plastic wrap and let the cheesecake chill in the refrigerator for at least 240 minutes.
- Prepare to serve: Once set, run a knife around the edges of the cheesecake before unhooking the springform pan.
Notes
This dessert can be made ahead of time as it tastes even better after chilling overnight.
Nutrition
- Serving Size: 1 slice
- Calories: 350
- Sugar: 25g
- Sodium: 300mg
- Fat: 20g
- Saturated Fat: 10g
- Unsaturated Fat: 8g
- Trans Fat: 0g
- Carbohydrates: 40g
- Fiber: 1g
- Protein: 4g
- Cholesterol: 40mg
Keywords: cheesecake, no-bake dessert, marshmallow, fluffy dessert, sweet treat, party dessert