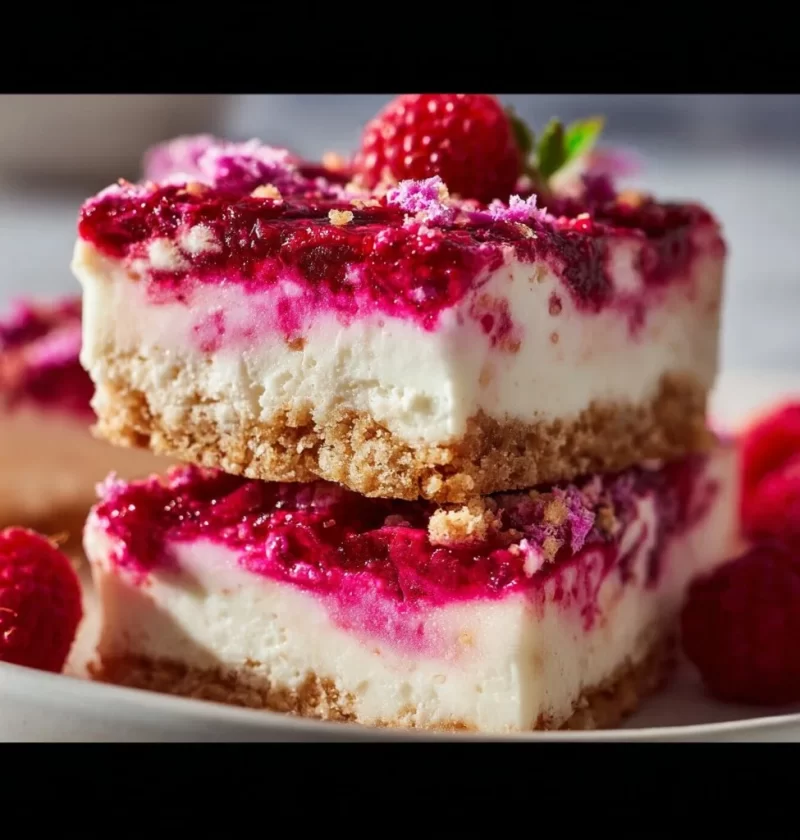
Gluten-Free Raspberry Yogurt Bars: A Sweet, Tart Slice of Heaven
Ah, the blissful joy of baking! There’s something absolutely magical about the way the kitchen transforms when I whip out my mixing bowls; it’s like stepping into a world of aromas, vivid colors, and endless warmth. Today, I’m excited to share a delightful recipe that perfectly embodies the spirit of cozy home cooking—gluten-free raspberry yogurt bars! These bars are sweet, tart, and rich in flavor, making them the perfect treat for any occasion.
Now, why raspberry yogurt bars, you ask? Well, let me take you back to a sunny afternoon at Grandma’s house. I can still picture her cozy kitchen, a dreamy corner filled with the luscious smell of sweet berries baking in the oven. I remember standing on a stool, peering over the counter, eager to help—and sneak bites of batter along the way! Grandma always said that dessert is where the heart is, and boy, did she know how to whip up a treat! Her raspberry yogurt bars were one of my absolute favorites, a delightful combination of creamy yogurt and bursts of tangy raspberry that made every bite a little celebration.
Today, we’re keeping that beautiful tradition alive, but with a gluten-free twist that makes it accessible to more friends and family. Whether you’re gluten-sensitive or simply looking to shake things up in the kitchen, these bars will make your taste buds sing! So put on your apron and let’s embark on this delicious journey together!
A Recipe That’s Full of Heart
When it comes to cooking, every ingredient counts. Below is a list of what you’ll need to create these mouthwatering raspberry yogurt bars—don’t forget to have a few kitchen staples on hand to make this process even easier!
Ingredients
-
120 g (1 cup) gluten-free flour blend
This serves as the foundation for our base, providing texture without the gluten. If you don’t have gluten-free flour blend, you can use almond flour or oat flour—though the texture may vary a bit. -
100 g (1 cup) oats
A hearty addition that gives our bars a lovely chewiness. If you have a gluten intolerance, make sure to use gluten-free oats to keep it safe! -
130 g (¾ cup) sugar
For that perfect sweetness without overshadowing the tart raspberries. If you prefer, you can substitute with coconut sugar or even a sugar alternative like Stevia to reduce calories. -
½ tsp baking powder
This is our rising agent, making sure our bars don’t turn into mini bricks! If you’re in a pinch, you can replace this with baking soda (use half the amount). -
120 g (½ cup) unsalted butter
Butter adds richness and flavor! You can swap this for a buttery vegan substitute or coconut oil if that’s more your style. -
1 tsp pure vanilla extract
A must for any sweet treat; it brings a delightful depth to the bars. Make sure to opt for pure vanilla rather than imitation for the best flavor. -
Zest from one lemon
The zest adds brightness and elevates the overall flavor profile—don’t skip this! If you don’t have a lemon, feel free to use lime zest. -
430 g (1½ cup) lactose-free Greek yogurt
Our star ingredient! It’s creamy, tangy, and provides a lovely moisture to our bars. Regular thick yogurt works too if lactose isn’t a concern. -
3 Tbsp (40 g) sugar
This one goes into the yogurt mixture, balancing out the tartness of the raspberries. Again, if you want to go low-sugar, try a natural sweetener. -
2 Tbsp (16 g) cornstarch
This helps stabilize our yogurt filling so it sets beautifully. If you need a substitute, try arrowroot powder or a gluten-free thickener instead. -
300 g (10 oz) raspberries
Fresh or frozen, these little gems provide our fruity explosion! If you can’t find raspberries, feel free to swap with blueberries or blackberries; just adjust the sugar accordingly.
Step-by-Step Cooking Guide
Now that we have all our ingredients lined up, let’s get cooking! Here’s how to make these delightful bars step by step:
Step 1: Preheat Your Oven
Preheat your oven to 350°F (175°C). Prepping the oven first ensures that we have perfectly baked bars by the end of the process.
Step 2: Mix the Dry Ingredients
In a large mixing bowl, combine your gluten-free flour blend, oats, sugar, and baking powder. Use a whisk to thoroughly mix the dry ingredients together—this helps ensure an even distribution of the baking powder and sugar.
Step 3: Add Butter and Vanilla
Next, melt your unsalted butter (either in a microwave or on the stove), and let it cool slightly. Pour the melted butter and the vanilla extract into the dry mixture. As you stir, you’ll notice the ingredients coming together into a crumbly consistency. This is just what we want! Little chef tip: If you want to add a nutty flavor, consider toasting the oats briefly before this step.
Step 4: Create the Base Layer
Grab a lined 8×8-inch baking dish and press about two-thirds of the crumbly mixture into the bottom. Use a spatula to flatten it evenly. This is our sturdy base, and we want it to be nice and compact for the perfect bite!
Step 5: Prepare the Yogurt Filling
In another bowl, combine the Greek yogurt, the remaining sugar, cornstarch, and the zesty lemon. Stir until it’s all nicely blended and smooth. This filling is where the magic happens, so take a moment to enjoy the comforting aroma.
Step 6: Layer with Raspberries
Gently fold in the raspberries, being careful not to break them up too much. We want sweet berry pockets throughout our luscious yogurt filling! Spoon this mixture over the pressed base layer in the baking dish, spreading it out evenly.
Step 7: Crumble the Topping
Sprinkle the remaining crumble mixture over the top of the yogurt filling. You want to create a lovely, uneven layer of crumbs that will form a delightful crust once baked.
Step 8: Bake Away!
Pop the dish into the preheated oven and bake for 35-40 minutes, until the top is golden brown, and the filling is set. Your kitchen will fill with the irresistible scent of baking berries—trust me, this is the best part!
Step 9: Cool and Enjoy
After baking, allow the bars to cool in the pan for at least 20 minutes before transferring them to a wire rack. Here’s a nifty tip: cooling them down will make slicing them easier later! Once they’re completely cool, cut into squares and prepare for a taste of heaven.
Serving Suggestions
For an elegant presentation, serve these luscious bars on a beautiful platter with fresh mint leaves sprinkled around them. You can also dust a little powdered sugar on top to elevate the look—who doesn’t love a little extra sweetness? Pair with a dollop of whipped cream or a scoop of vanilla ice cream for a truly indulgent experience!
Recipe Variations
Feeling adventurous? Here are a couple of creative twists you can try:
- Chocolate Twist: Drizzle melted dark chocolate over the bars once they’re cooled for a decadent touch!
- Nutty Kick: Add chopped nuts such as almonds or walnuts to the crumble for added crunch and flavor.
- Seasonal Swap: Use seasonal fruits like peaches, cherries, or even apple slices to create different flavor profiles.
- Sugar-Free Option: Replace the sugar with your favorite natural sweetener to make this a guilt-free treat.
Chef’s Notes
This recipe has been a labor of love over the years. Each batch comes with its own little surprises—sometimes the raspberries might be extra tart, or perhaps you find a pocket of yogurt that’s especially rich! What I love most about these bars is that they blend nostalgia with creativity—you can adjust them based on what you have in your pantry. Just remember, the more love you put in, the more delicious they will come out!
FAQs and Troubleshooting
1. My bars are too crumbly; what happened?
If your bars are too crumbly, it could be due to not enough moisture. Try adjusting the yogurt slightly, adding a tablespoon or two more.
2. Can I use frozen raspberries?
Absolutely! If you’re using frozen raspberries, there’s no need to thaw them; just fold them in still frozen. They’ll release juice as they bake, making the bars even more delicious.
3. Can I skip the cornstarch?
Yes, but keep in mind that omitting it might make the filling less stable. If you’d like a substitution, you can try arrowroot powder or even a little extra flour.
4. How should I store leftover bars?
These raspberry yogurt bars are best stored in an airtight container in the refrigerator where they’ll last for about 4-5 days. Enjoy them cold straight from the fridge or reheat them slightly in the microwave for a warm treat!
Nutritional Info (Optional)
For those counting calories, here’s a rough estimate per bar (assuming 16 servings):
- Calories: 150
- Total Fat: 7g
- Saturated Fat: 4g
- Sugar: 10g
- Protein: 4g
- Carbohydrates: 19g
There you have it—a delicious, heartfelt recipe for gluten-free raspberry yogurt bars! I hope these bars become a favorite in your kitchen, just as they have been in mine. So pull up a chair, invite some friends over, and let’s make wonderful memories filled with laughter, good food, and lots of love! Happy cooking!
PrintGluten-Free Raspberry Yogurt Bars
Delightful gluten-free raspberry yogurt bars that are sweet, tart, and perfect for any occasion.
- Prep Time: 15 minutes
- Cook Time: 40 minutes
- Total Time: 55 minutes
- Yield: 16 servings 1x
- Category: Dessert
- Method: Baking
- Cuisine: American
- Diet: Gluten-Free
Ingredients
- 120 g (1 cup) gluten-free flour blend
- 100 g (1 cup) oats
- 130 g (¾ cup) sugar
- ½ tsp baking powder
- 120 g (½ cup) unsalted butter
- 1 tsp pure vanilla extract
- Zest from one lemon
- 430 g (1½ cup) lactose-free Greek yogurt
- 3 Tbsp (40 g) sugar
- 2 Tbsp (16 g) cornstarch
- 300 g (10 oz) raspberries
Instructions
- Preheat your oven to 350°F (175°C).
- Mix the gluten-free flour blend, oats, sugar, and baking powder in a large mixing bowl.
- Add melted butter and vanilla extract to the dry mixture and stir until crumbly.
- Create the base layer by pressing two-thirds of the mixture into a lined 8×8-inch baking dish.
- Prepare the yogurt filling by combining Greek yogurt, remaining sugar, cornstarch, and lemon zest in another bowl.
- Layer in the raspberries, being careful not to break them, and spoon the mixture over the base layer.
- Sprinkle the remaining crumble mixture over the yogurt filling.
- Bake for 35-40 minutes until golden brown and the filling is set.
- Cool in the pan for 20 minutes before transferring to a wire rack, then cut into squares and enjoy!
Notes
For an elegant presentation, serve with mint leaves and a dusting of powdered sugar. Optional: Pair with whipped cream or vanilla ice cream.
Nutrition
- Serving Size: 1 square
- Calories: 150
- Sugar: 10g
- Sodium: 50mg
- Fat: 7g
- Saturated Fat: 4g
- Unsaturated Fat: 2g
- Trans Fat: 0g
- Carbohydrates: 19g
- Fiber: 2g
- Protein: 4g
- Cholesterol: 15mg
Keywords: gluten-free, raspberry yogurt bars, dessert recipes, healthy snacks