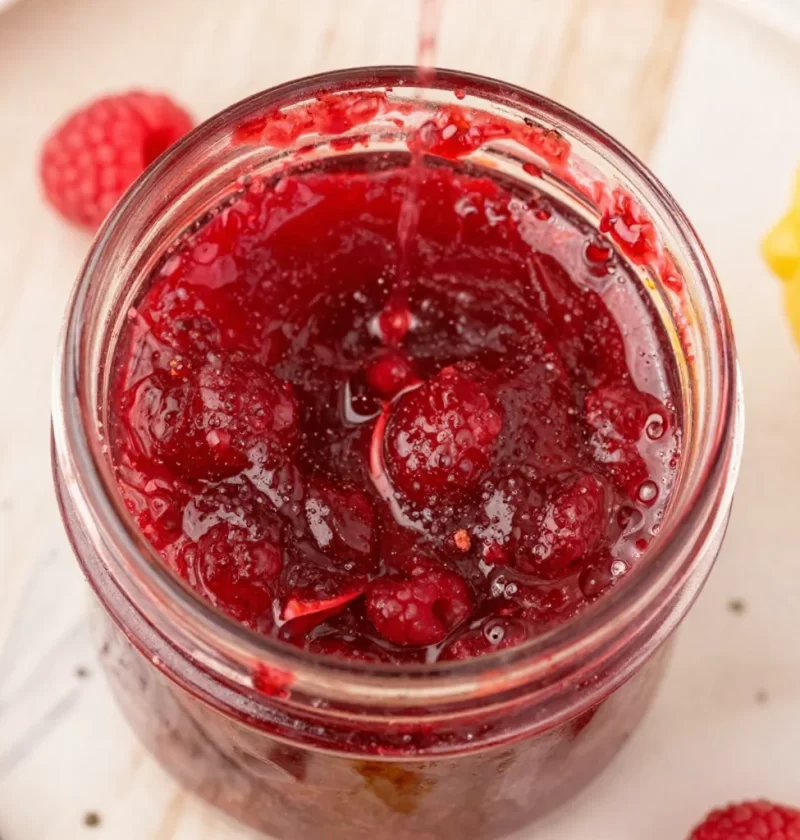
Classic Raspberry Jam: A Sweet Journey in Every Jar
Hello, friends! Today, we’re diving into the world of homemade goodness with a recipe that brings back the sweetest memories—Classic Raspberry Jam. As we plunge into this delightful project, my heart bursts with nostalgia, conjuring images of sunny afternoons spent foraging for raspberries in my grandmother’s backyard. There’s something incredibly enchanting about picking fresh fruit straight from the vine, and those memories just make this jam taste that much better!
When it comes to jam, there’s a certain magic in transforming simple ingredients into something that can brighten any breakfast table. Whether it’s slathered on warm, buttered toast or dolloped over a fresh scone, raspberry jam is a culinary treasure that celebrates the essence of summer in every bite. It’s also an open invitation to slow down and enjoy the small pleasures of life—transforming fresh fruit into a jar of sunshine you can savor year-round.
The best part? Making your own jam is not only rewarding but also incredibly simple! You don’t need a degree from a culinary school; all you need is a pot, a spoon, and a little bit of enthusiasm! So, grab your apron and let’s make some delicious Raspberry Jam that will have everyone begging for a second helping.
A Sweet Memory
I’ll never forget those summer days spent with my grandmother, who was a fierce believer in homemade treats. On those balmy afternoons, she would lead me into her bountiful garden, where raspberry bushes flourished under the sun, their bright berries practically calling out to be picked. The joy of plucking those little gems and popping them straight into my mouth was a childhood rite of passage.
Once we had gathered a basketful of raspberries, we would head into her cozy kitchen, the air smelling sweet and warm. I remember her precise measurements, telling me that each cup of raspberries had to be just right. As she cooked over the stove, the sound of bubbling berries and sugar merging filled the room, creating a symphony that hinted at the deliciousness to come.
That raspberry jam was the best part of summer, and it became a staple at our family gatherings, a taste of nostalgia that we could all enjoy. Now, as I share this recipe with you, I hope to pass on that joy and encourage you to make memories of your own while creating something delicious in your kitchen.
Ingredients
Here’s what you’ll need to whip up your own jar of paradise:
-
Raspberries (4 cups): The star of our jam! Fresh raspberries are ideal, but you can also use frozen if that’s what you have. Just be sure to thaw them first and drain any excess liquid.
-
Sugar (4 cups): This acts as a natural preservative and helps obtain that lovely sweetness we all adore in jams. If you’re looking for alternatives, you can try using honey or agave syrup, but keep in mind that those will change the flavor profile a bit.
-
Lemon juice (1/4 cup): This adds a lovely brightness and helps balance the sweetness of the sugar. Freshly squeezed is best, but bottled lemon juice works in a pinch. Just be cautious about the quantity; too much can make the jam too tart!
It’s important to remember that making jam is about balance. The raspberries bring a beautiful sweetness and tartness, while the sugar enhances those flavors and the lemon juice adds that needed zing. Together, they create a symphony of taste that’s simply unforgettable.
Step-by-Step Instructions
Ready to get cooking? Here’s how to make your own classic raspberry jam!
-
Prep Your Berries: Start by washing your raspberries gently under cold water to remove any dirt or tiny critters. Aim to handle them delicately to avoid squishing. Pat them dry with a clean kitchen towel once they’re nice and clean. Chef’s Tip: A colander works wonders here!
-
Combine Ingredients: In a large stockpot, combine 4 cups of raspberries, 4 cups of sugar, and 1/4 cup of lemon juice. Give everything a good stir to make sure the sugar is evenly distributed throughout the berries. Little Chef Hack: Let it sit for about 10 minutes. This allows the sugar to start drawing out the raspberry juices, creating a lovely syrup.
-
Cook the Jam: Place your stockpot over medium heat and bring the mixture to a gently bubbling simmer. Stir occasionally to avoid any sticking, and let those beautiful aromas fill your kitchen! As it cooks, you’ll notice the berries breaking down. Light and flaky, that’s what we want!
-
Testing for Doneness: After 20 to 30 minutes, you need to check if it’s set. You can do this by placing a spoonful of jam on a cold plate and placing it into the freezer for a few minutes. If it thickens to your desired consistency, you’re good to go! If not, allow it to simmer for a few more minutes and test again. Pro tip: Don’t rush this crucial step; patience is the key!
-
Jarring Up: Once your jam has reached perfection, carefully ladle it into sterilized jars while it’s still hot. Make sure to leave some space at the top. After jarring, let it sit undisturbed at room temperature for about 24 hours to set properly. Safety first: Use a funnel, so you don’t spill any precious jam on your counters!
-
Storage: Label your jars with the date and store them in a cool, dark place. You can also pop them in the fridge if you plan to use them soon. If preserved correctly, your raspberry jam can last up to a year! Chef’s Note: Don’t forget to save some for yourself instead of giving it all away!
Serving Suggestions
Now that your raspberry jam is ready, how do you enjoy it? The options are endless! Spread it generously over warm, buttery toast, tucked neatly alongside a generous dollop of cream cheese for a delightful brunch treat. Use it as a filling for pastries or swirl it into yogurt or oatmeal for a sweet breakfast surprise. You can even serve it alongside cheese on a charcuterie board for a charming combo that will wow your guests.
Recipe Variations
Feeling adventurous? Here are a few fun twists you can make with your classic raspberry jam:
-
Raspberry Vanilla Jam: Add a splash of vanilla extract (or a vanilla bean!) to the mixture during cooking for a lovely, aromatic touch.
-
Spicy Raspberry Jam: Infuse a pinch of cayenne pepper or finely minced jalapeño for a sweet and spicy twist that pairs beautifully with meats.
-
Rosemary Infusion: Add a couple of sprigs of fresh rosemary during cooking for a sophisticated herbal note; remove the sprigs before jarring.
-
Mixed Berry Jam: Experiment with other berries! Blend raspberries with blackberries, blueberries, or strawberries for a vibrant mix.
-
Lower Sugar Option: Use a sugar substitute that’s designed for canning to lower the sugar content if you need a healthier alternative.
Chef’s Notes
Oh, how this recipe holds so many cherished memories! Over the years, I’ve tweaked it here and there, experimenting with different flavors and techniques. One summer, in an effort to use up a massive raspberry bounty from my garden, I attempted to invite friends over for a jam-making party. We were elbow-deep in berries, joyful laughter echoing around the kitchen, when someone accidentally poured in an entire cup of salt instead of sugar!
Naturally, we erupted into laughter and decided to turn it into a humorous cooking lesson. After a tasty redo, we ended the night with jars of jam and bellies full of delicious treats. Now, every time I make this jam, I think of that glorious disaster and the sweet connections forged in the kitchen.
FAQs and Troubleshooting
Q: Why isn’t my jam thickening?
Sometimes, jam can be tricky. If it isn’t thickening, it might need more cooking time, or perhaps the fruit wasn’t ripe enough. If you’re ever in a bind, a teaspoon of pectin can work wonders to help it achieve that perfect spreadability.
Q: Can I freeze raspberry jam?
Absolutely! Just make sure to use freezer-safe containers and leave some space for expansion. Raspberry jam is great frozen, allowing you to enjoy a taste of summer in the chilly months ahead.
Q: How can I tell if my jam has spoiled?
If you see mold on the surface or detect any off-smells, it’s best to toss it out. Properly canned jam should maintain its quality for a year, but always trust your senses!
Q: How can I measure the sugar accurately?
Using a kitchen scale can help you, as each fruit has a different density. A quick online search can provide precise weight conversions!
Nutritional Info
While this jam is a delightful addition to various dishes, it’s important to consume it in moderation due to its sugar content. Per tablespoon of homemade raspberry jam, expect approximately 50 calories. Each jar is not just a taste experience but also filled with memories that last a lifetime!
Now, dear friends, go forth and create! I hope this classic raspberry jam brings as much joy to your kitchen as it has to mine. Don’t forget to share your delicious creations with friends and family—the more, the merrier! Happy cooking!
PrintClassic Raspberry Jam
A homemade classic that transforms fresh raspberries into a delightful jam, perfect for breakfast or as a pastry filling.
- Prep Time: 15 minutes
- Cook Time: 30 minutes
- Total Time: 45 minutes
- Yield: 4 servings
- Category: Condiment
- Method: Canning
- Cuisine: American
- Diet: Vegetarian
Ingredients
- Raspberries (4 cups)
- Sugar (4 cups)
- Lemon juice (1/4 cup)
Instructions
- Prep your berries: Start by washing your raspberries gently under cold water to remove any dirt or tiny critters. Pat them dry with a clean kitchen towel.
- Combine ingredients: In a large stockpot, combine 4 cups of raspberries, 4 cups of sugar, and 1/4 cup of lemon juice. Stir to distribute the sugar evenly throughout the berries.
- Cook the jam: Place the stockpot over medium heat and bring the mixture to a gentle simmer, stirring occasionally to avoid sticking.
- Testing for doneness: After 20 to 30 minutes, place a spoonful of jam on a cold plate and check if it thickens to your desired consistency.
- Jarring up: Ladle the jam into sterilized jars while it’s still hot, making sure to leave some space at the top.
- Storage: Label your jars and store them in a cool, dark place or refrigerate if using soon.
Notes
Feel free to experiment with flavors and enjoy it fresh on toast or as a dessert topping.
Nutrition
- Serving Size: 1 tablespoon
- Calories: 50
- Sugar: 12g
- Sodium: 1mg
- Fat: 0g
- Saturated Fat: 0g
- Unsaturated Fat: 0g
- Trans Fat: 0g
- Carbohydrates: 13g
- Fiber: 1g
- Protein: 0g
- Cholesterol: 0mg
Keywords: jam, raspberry, homemade, preserve, condiment