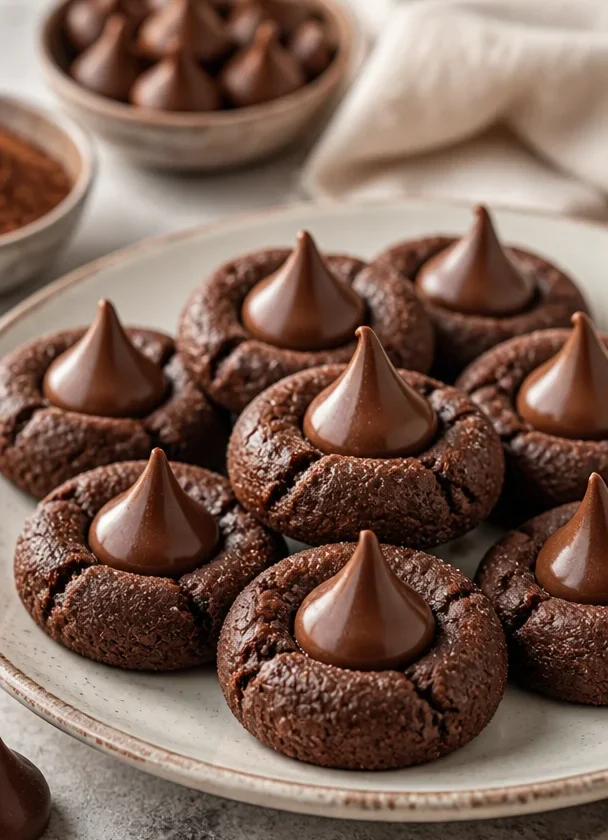
Witch Hat Cookies: A Spooky Treat with a Sweet Story
Welcome, fellow food enthusiasts! Today, we’re diving into a beloved, whimsical treat: Witch Hat Cookies. These delightful confections are not only a visual feast but also a sugary reminder of the charming autumn days of my childhood. Just picture it: leaves falling, the air crisp with the promise of Halloween, and the delightful aroma of sweet cookies wafting through the kitchen. Join me as I share how to create these enchanting cookies that will leave everyone spellbound!
A Taste of Nostalgia
When I think back to my childhood, one memory stands out vividly—my first Halloween party at school. I remember walking into the classroom, where every corner was decorated with cobwebs, ghosts, and pumpkins. But what captivated my young heart was the dessert table filled with all sorts of treats, especially the infamous "witch hat" cookies.
My mother had baked them, each little hat constructed of an upside-down cookie, topped with a chocolate kiss, and artfully decorated with colorful icing. Watching her create these masterpieces was magical—her laughter mingled with the crackling of the oven, the warmth of the kitchen wrapping around us like a cozy hug. The excitement of eating something so wonderfully playful made these cookies an instant favorite.
As I grew older, I found joy not just in eating these cookies, but in making them myself, recreating those beautiful memories. Today, I want to share this simple yet captivating recipe with you, so you can make your own memories, creating and enjoying these delightful Witch Hat Cookies.
Ingredients
To create your enchanting Witch Hat Cookies, gather the following ingredients:
- Chocolate Wafer Cookies: The base of your witch hats. If you can’t find chocolate wafers, graham crackers can be a nice alternative.
- Chocolate Kisses: These delightful candies serve as the ‘hat’ of the witch. You can substitute them with any chocolate candy of your choice if you’re feeling adventurous!
- Decorating Icing: You can use store-bought icing or make your own. For ease, a tube of ready-made icing will work just fine.
- Green Colored Sugar: This adds a fun, magical sparkle, and you can swap it with any color sugar to match your theme.
- Optional Add-ins: Sprinkles or edible glitter for that extra touch of whimsy!
By selecting these ingredients, you’ll ensure a delightful balance of taste and texture. Don’t hesitate to ask a local baker about substitutes if you have allergies or preferences—baking is all about adaptability and creativity.
Step-by-Step Instructions
Let’s get baking! Follow these simple steps to make your Witch Hat Cookies:
-
Preheat the Oven: Preheat your oven to 350°F (175°C). This is essential for ensuring that your cookies bake evenly.
-
Prepare the Cookies: Place your chocolate wafer cookies on a baking sheet lined with parchment paper. It’s always a good idea to line your pans to prevent sticking and for easy cleanup!
-
Melt the Chocolate Kisses: Unwrap your chocolate kisses and place them on a microwave-safe plate. Microwave for about 10-15 seconds until they’re soft but not melted. This will create a adhesive surface for attaching to the cookies.
-
Assemble the Hats: Carefully press one melted chocolate kiss onto the center of each cookie. This forms the witches’ hat! Allow them to set up for a minute.
-
Decorate: Use the decorating icing to create a decorative band around the base of the chocolate kiss. You can also make little designs on the cookies if creativity strikes!
-
Add the Holiday Sparkle: While the icing is still wet, sprinkle the colored sugar on it. If you want to get fancy, use edible glitter to add a magical sheen.
-
Cool and Serve: Let the cookies cool completely before serving them. This is crucial so that your beautiful creations hold their shape and don’t smear!
Each step is designed with care and a bit of magic—don’t rush! Enjoy the process, and I guarantee you will feel that childhood glee come rushing back as you create your witch hats!
Serving Suggestions
These Witch Hat Cookies are best served on a festive platter, surrounded by autumn-themed decorations such as small pumpkins or fall leaves for that perfect Halloween vibe. You can also pair them with warm apple cider or hot chocolate for a cozy treat. For an added touch, arrange them with other fun Halloween treats, like ghost-shaped marshmallows or pumpkin spice cupcakes.
Recipe Variations
Get creative with your Witch Hat Cookies! Here are a few variations to inspire your baking adventure:
- Spooky Mummies: Use vanilla wafers instead of chocolate and white chocolate melts for the hats. Add candy eyes for a charming twist!
- Candy Corn Hats: Decorate the hats with white icing and tiny candy corn on top for a colorful presentation.
- Nutty Toppers: Mix in chopped nuts with your chocolate kisses before placing them on top to add texture and flavor.
- Gluten-Free Option: Substitute regular wafers with gluten-free cookies to cater to those with dietary needs.
Remember, there are no limits in the kitchen—let your imagination run wild!
Chef’s Notes
I’ve found that this recipe evolves each time I make it. Sometimes, I crave a more sophisticated flavor, and I opt for dark chocolate kisses. Other times, just for fun, I throw in some edible glitter or colorful sprinkles! There’s something incredibly fulfilling about creating a treat that brings joy not only to you but to those around you.
Speaking of joy, I vividly remember a Halloween where I brought these cookies to a community potluck. Everyone loved them so much that there were none left by the end of the night. That memory reminds me that food is not just about sustenance; it’s about sharing experiences and creating joyful moments with others!
FAQs and Troubleshooting
-
Can I use different cookie styles?
- Absolutely! While chocolate wafers are traditional, any flat, sturdy cookie like biscotti or oat biscuits can work well too.
-
What if my chocolate kisses won’t stick?
- If the kisses won’t adhere properly, consider melting them slightly more or using a spoonful of frosting as glue!
-
How do I store leftovers?
- Keep your cookies in an airtight container at room temperature for up to a week. Just be mindful not to stack them too high!
-
My icing is too runny! What now?
- If you find your icing is too thin, simply add a bit more powdered sugar to thicken it. You want it to hold its shape when piped.
Nutritional Info
Each Witch Hat Cookie typically contains about 100 calories, making them a fun little indulgence rather than a complete meal. They pack in sugar and carbohydrates primarily, with minimal fat from the chocolate and cookies. Remember to enjoy these cookies in moderation, especially during the festive season when sweets are abundant!
Final Thoughts
Baking these Witch Hat Cookies is more than just a fun activity; it’s an opportunity to create memories, infuse the season with joy, and share delightful treats with loved ones. As you gather your ingredients and shape your cookies, embrace the joy of the cooking process.
Whether you’re planning for Halloween or just want to channel some playful creativity in the kitchen, I hope this recipe inspires you to bake, share, and savor. So roll up your sleeves, summon your inner witch, and let’s create some Magic in the kitchen! Happy baking!
PrintWitch Hat Cookies
Delightful cookies shaped like witches’ hats, perfect for Halloween gatherings.
- Prep Time: 15 minutes
- Cook Time: 10 minutes
- Total Time: 25 minutes
- Yield: 12 servings
- Category: Dessert
- Method: Baking
- Cuisine: American
- Diet: Vegetarian
Ingredients
- Chocolate Wafer Cookies
- Chocolate Kisses
- Decorating Icing
- Green Colored Sugar
- Optional Add-ins: Sprinkles or edible glitter
Instructions
- Preheat the oven to 350°F (175°C).
- Prepare the cookies by placing chocolate wafer cookies on a lined baking sheet.
- Melt chocolate kisses in the microwave for about 10-15 seconds until soft.
- Assemble by pressing a melted chocolate kiss onto the center of each cookie.
- Decorate with icing around the base of the chocolate kiss.
- Add colored sugar while the icing is wet.
- Cool cookies completely before serving.
Notes
Feel free to customize with different colors of sugar or add-ins like sprinkles.
Nutrition
- Serving Size: 1 cookie
- Calories: 100
- Sugar: 10g
- Sodium: 50mg
- Fat: 4g
- Saturated Fat: 2g
- Unsaturated Fat: 2g
- Trans Fat: 0g
- Carbohydrates: 15g
- Fiber: 0g
- Protein: 1g
- Cholesterol: 5mg
Keywords: witch hat cookies, Halloween cookies, festive treats, spooky cookies