Fruit Pizza Recipe: A Slice of Joy on Your Table
Hey there, fellow flavor lovers! Today, I’m excited to share one of my all-time favorite treats: Fruit Pizza. Now, before you start picturing a traditional tomato sauce and cheese combo, let me clarify! This delightful dessert is all about a buttery cookie crust topped with a sweet, creamy spread and a vibrant array of colorful fruits. It’s like a fruit salad took a vacation in cookie land—delicious, fun, and utterly irresistible.
A Flavorful Memory
Let me take you back to sunny afternoons filled with laughter, the smell of cookies baking, and the sound of family gathering around. I remember vividly the days when my grandmother would whip up her famous fruit pizza for family gatherings. The kitchen would fill with a warm, buttery aroma as she crafted the crust, often bringing us all together in joyful anticipation. My cousins and I would eagerly wait while she layered the luscious cream cheese filling and arranged a rainbow of fruits on top.
The first bite was always heavenly—the way the sweet creaminess contrasted with the fresh, juicy fruit was pure bliss. It was more than just a dessert; it was a celebration of togetherness. I’ve carried that memory into my kitchen, and now I want to share this nostalgic dessert with you, so you can create your own joyful moments.
Ingredients
Here’s what you’ll need to create this delightful Fruit Pizza:
-
1 cup butter (salted, cut into cubes)
This is the star ingredient! Salted butter adds richness and flavor. If you’re on a low-sodium diet, feel free to substitute unsalted butter and add a pinch of salt to balance the sweetness. -
1 cup granulated sugar
Sugar not only sweetens but also helps to create a tender texture in the crust. If you’re looking for a healthier alternative, consider using coconut sugar or agave syrup, but keep in mind that it may change the texture a bit. -
1 egg
Eggs are crucial for binding the ingredients and adding moisture. If you’re vegan or allergic, a flax egg (1 tablespoon of ground flaxseed mixed with 2.5 tablespoons of water) works wonderfully. -
1/2 teaspoon vanilla extract
This adds a delightful aroma and depth of flavor. For an interesting twist, try using a vanilla bean or vanilla paste to enhance that flavor even more! -
1/2 teaspoon almond extract
Almond extract brings a wonderful nutty flavor that complements the fruits beautifully. If you’re not a fan, feel free to omit it or substitute it with additional vanilla extract. -
2 teaspoons baking powder
This is crucial for creating that light and fluffy texture. Make sure your baking powder is fresh; an expired one may leave your crust flat. -
3 cups all-purpose flour
Flour is the backbone of any cookie crust. For a gluten-free option, use a 1:1 gluten-free flour blend. Just be aware that texture may vary. -
3.9 oz instant vanilla pudding (1 box)
This adds an irresistible creaminess to the base layer. If you’re looking for different flavors, go for chocolate or butterscotch pudding for an exciting change! -
1 1/2 cups cold milk
Cold milk helps in creating that perfect creamy filling. For dairy-free options, almond milk or coconut milk can work just as well. -
3/4 teaspoon almond extract
Again, this adds a pleasant depth to the filling. Feel free to experiment with different extracts—like coconut or hazelnut—for a unique twist! -
1 cup heavy whipping cream
This creates the lush, creamy topping. If you’re reducing calories, whip up some low-fat cream or coconut cream for a lighter option. -
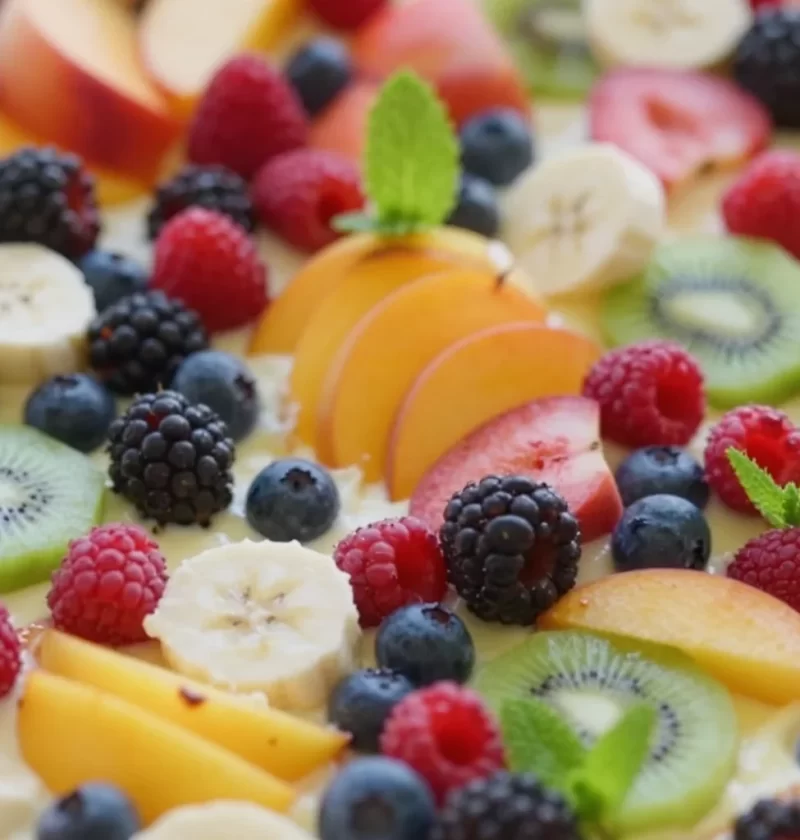
Berries, peaches, kiwis, bananas, etc. (washed and sliced if needed)
Use your favorite fruits! The variety adds color and flavor. Be adventurous; try seasonal fruits or even colorful edible flowers for a stunning presentation.
Step-by-Step Instructions
Let’s get rolling and create this delicious Fruit Pizza! Here’s how to do it:
-
Preheat your oven to 350°F (175°C). It’s essential to have the perfect temperature for baking that buttery crust. Your kitchen will smell amazing in no time!
-
Make the cookie crust. In a large mixing bowl, cream together the butter and sugar until it’s light and fluffy. You can use a hand mixer or stand mixer for this, but I personally love the arm workout from mixing it by hand! This step is crucial; it incorporates air for a fluffy texture!
-
Add the egg, vanilla, and almond extract. Mix these in one at a time, blending well after each addition. You’re aiming for a silky mixture that looks glossy and inviting.
-
In another bowl, combine the flour, baking powder, and instant pudding mix. Slowly add this dry mixture to the wet mixture, mixing until just combined. Be careful not to overmix; we want tender cookies, not tough ones!
-
Spread the dough in a greased baking pan. Use a spatula to evenly press it into the bottom of the pan, making it about 1/4 inch thick. Maybe use your fingers to make sure it’s uniform; it gives it a great, rustic look!
-
Bake the crust in the preheated oven for 12-15 minutes or until the edges are golden brown. Your home will start to smell like a patisserie! Make sure to keep an eye on it towards the end—it can go from beautiful to burnt in a heartbeat!
-
Let the crust cool completely. This is one of those important steps that can be tempting to skip, but trust me. A warm crust will make the toppings melt!
-
Prepare the creamy filling. In a clean bowl, whisk together the instant vanilla pudding mix with cold milk for about 2 minutes until it thickens. Then, fold in the whipped cream until everything is well combined. This is the moment you might want to sneak a taste—it’s heavenly!
-
Spread the creamy layer over the cooled cookie crust using another spatula. Make it as thick or thin as you like—go wild with it!
-
Decorate with fruits. Now comes the fun part! Arrange your fruits on top of the cream in any whimsical pattern you like. I often let my kids create their own designs—sometimes it’s a masterpiece, sometimes abstract art, but it’s always fun!
-
Chill again. Let the assembled fruit pizza sit in the fridge for about an hour. This helps everything come together and gives you a refreshingly cool dessert!
-
Slice and serve! When you’re ready to enjoy, slice it into wedges or squares and watch smiles light up the room. You can even serve it with a sprinkle of extra chopped fruits on the side for a pop of color!
Serving Suggestions
To elevate your presentation, place slices on colorful plates and drizzle with a little honey or chocolate sauce. It’s a joyful way to show off your creation! Additionally, pairing it with a scoop of vanilla ice cream or whipped cream on the side can take it up a notch. Serve it during brunch, a casual get-together, or as a delightful dessert after dinner. The vibrant colors are sure to brighten anyone’s day!
Recipe Variations
Feeling adventurous? Here are a few creative twists you can try with your Fruit Pizza:
- Chocolate Drizzle: Melt some chocolate chips and drizzle over the fruit for a decadent touch.
- Lemon Zest: Add a teaspoon of lemon zest to the cream layer for a refreshing zing.
- Nutty Crust: Incorporate ground nuts like almonds or walnuts into the cookie crust for a crunch.
- Seasonal Fruits: Switch it up for holidays or seasons—try pumpkin for fall or cranberries for winter!
- Add Spices: Sprinkle cinnamon or nutmeg on the toppings for warmth and depth.
Chef’s Notes
I’ve made this fruit pizza for countless gatherings, and with every creation, it’s evolved a bit. The best part? Everyone gets excited about it! Once, I even made a chocolate chip cookie crust instead of the traditional one, and it turned out amazing. Just goes to show that in cooking, there are no hard and fast rules—just delicious possibilities!
FAQs and Troubleshooting
1. Why is my cookie crust falling apart?
If your crust crumbles too easily, it might be because you didn’t use enough butter or eggs, or perhaps you overbaked it. Make sure to give it a solid mix and keep an eye on the baking time!
2. How can I make this dessert ahead of time?
You can prepare the cookie crust a day in advance and store it in an airtight container. Assemble with the cream and fruits just before serving to keep everything fresh.
3. What fruits work best for decoration?
Berries are always a crowd-pleaser, but feel free to experiment with any seasonal fruits. Just avoid fruits that brown quickly, like apples and bananas, unless you slice them just before serving.
4. Can I freeze this dessert?
While the crust freezes well, the cream and fruit toppings may not hold up quite as well after thawing. If you plan to freeze it, consider making the crust only, and then adding the toppings fresh when you’re ready to serve!
Nutritional Info
While indulging in delicious treats is great, it’s always nice to be mindful. This fruit pizza packs a bit of sugar, cream, and butter—so it’s definitely considered an occasional splurge! Each slice generally contains a blend of carbs, fat, and sugar, offering energy but should be balanced with healthy foods in your overall diet.
So, celebrate your sweet tooth while sharing a slice with family and friends. Enjoy the process, and thank you for joining me in crafting this lovely Fruit Pizza! Now grab that butter and let’s create delicious moments together!
PrintFruit Pizza

A delightful dessert featuring a buttery cookie crust topped with a creamy spread and colorful fruits.
- Prep Time: 20 minutes
- Cook Time: 15 minutes
- Total Time: 35 minutes
- Yield: 12 servings 1x
- Category: Dessert
- Method: Baking
- Cuisine: American
- Diet: Vegetarian
Ingredients
- 1 cup salted butter, cut into cubes
- 1 cup granulated sugar
- 1 egg
- 1/2 teaspoon vanilla extract
- 1/2 teaspoon almond extract
- 2 teaspoons baking powder
- 3 cups all-purpose flour
- 3.9 oz instant vanilla pudding (1 box)
- 1 1/2 cups cold milk
- 3/4 teaspoon almond extract
- 1 cup heavy whipping cream
- Berries, peaches, kiwis, bananas, etc. (washed and sliced if needed)
Instructions
- Preheat your oven to 350°F (175°C).
- Make the cookie crust by creaming together the butter and sugar until light and fluffy.
- Add the egg, vanilla, and almond extract one at a time, mixing well after each.
- Combine flour, baking powder, and instant pudding in another bowl.
- Mix the dry ingredients into the wet mixture until just combined.
- Spread the dough in a greased baking pan, about 1/4 inch thick.
- Bake for 12-15 minutes until edges are golden brown.
- Let the crust cool completely.
- Whisk together the pudding mix and cold milk until thick; fold in whipped cream.
- Spread the creamy layer over the cooled crust.
- Decorate with your choice of fruits on top.
- Chill for about an hour in the fridge.
- Slice and serve!
Notes
Serve with a sprinkle of extra chopped fruits or a scoop of ice cream for added delight.
Nutrition
- Serving Size: 1 slice
- Calories: 270
- Sugar: 16g
- Sodium: 150mg
- Fat: 12g
- Saturated Fat: 7g
- Unsaturated Fat: 4g
- Trans Fat: 0g
- Carbohydrates: 35g
- Fiber: 1g
- Protein: 4g
- Cholesterol: 30mg
Keywords: fruit pizza, dessert, sweets, cookie crust, cream cheese, summer dessert, colorful fruits